


 29th Sep, 2026
The Step-by-Step Process of Installing 3M Paint Protection Film
If you drive in Calgary, you already know the soundtrack. Gravel pings off the hood on Deerfoot Trail. Winter salt cakes your bumper before lunch. Then Stoney Trail adds one more chip to paint you’re still paying off.
Here’s the fix: 3M Paint Protection Film. It’s a clear, self-healing shield that takes the hit so your clear coat doesn’t have to.
But the film is only half the story. The install decides everything. Here’s how our certified detailers at Calgary Car Detailing apply it, start to finish, so you know what a seamless, invisible finish really takes.
Tools & Prerequisites: What It Takes to Apply PPF Correctly
You can’t install film in a dusty garage and expect miracles. Great PPF Calgary results start with the room itself. Our climate-controlled bay keeps temperature steady, because adhesive behaves very differently in a January cold snap than in a July heat wave. Here’s the setup:
• A clean-room style bay with no stray dust
• Controlled temperature all year
• High-lumen lighting that shows every flaw
Why does this matter? Cold shops stiffen the film and slow curing. Dusty ones trap debris under it. Either way, you pay for it later.
Then there’s the gear:
• 3M digital pattern plotter and software
• Slip solution (water and soap) and tack solution (alcohol and water)
• Ergonomic squeegees, heat guns, and clay bars
Step 1: Deep Surface Decontamination & Prep Work
Anything left on the paint gets sealed under the film. Forever. After a Calgary winter, that means salt, road tar, and baked-on grime, so we wash like we mean it. It’s the least glamorous step, and the most important.
• Hand wash and degreasing to lift road film and winter residue
• Chemical iron removal to dissolve embedded brake dust
• Clay bar treatment until the paint feels glass-smooth
Learn if you can apply 3M Paint Protection Film over existing paint jobs.
Step 2: Paint Correction & the Isopropyl Alcohol (IPA) Bath
Here’s the thing most people miss: PPF doesn’t hide swirl marks. It magnifies them. Whatever flaws sit on the paint today will be locked in and on display.
So we machine polish first, removing swirls and light scratches. Then we wipe every panel with IPA to strip leftover polishing oils. Clean paint means a stronger adhesive bond, and a bond that lasts through freeze-thaw swings.
Step 3: Computerized Precision Pattern Cutting (No Blades on Paint)
Ever heard of installers cutting film right on your car? Skip that shop. One slip and you’ve got a scratch under the very film meant to protect you.
We use 3M’s software to plot exact patterns for your hood, fenders, mirrors, and bumpers. The plotter does the cutting on a bench, not on your clear coat. That’s the standard we hold for every PPF Calgary client who rolls into our bay.
Step 4: Floating the Film & Slip/Tack Application
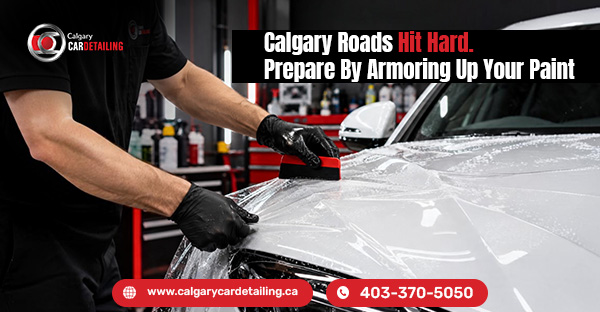
This is where skill shows up. We spray slip solution on the paint and the film’s adhesive side. The film then “floats,” so we can slide it into perfect position without it grabbing too soon.
Think of it like hanging wallpaper, except the wallpaper is a thin clear sheet and the wall is your car’s curved, expensive body. Patience beats speed here, and we reposition as many times as needed before anything sticks.
Once it’s aligned, tack solution takes over. It activates the pressure-sensitive adhesive along edges and tight curves, so the film starts locking down exactly where it should.
Step 5: Squeegee Purging, Contour Stretching & Edge Wrapping
Now the muscle memory kicks in. Every stroke has a job, and every curve needs a plan.
• Purge fluid and air from the center outward, using firm, overlapping strokes
• Heat-stretch the film around aggressive body lines and bumper curves
• Tuck edges behind panels so they’re invisible and tough to lift
One rushed pass leaves a bubble. One cold edge starts peeling in a month. We don’t rush, because your car’s front end takes the worst of the gravel and needs every edge sealed tight.
Step 6: Thermal Sealing, Curing & Quality Inspection
Hidden moisture needs time to evaporate, so we let the film dry fully. Then we post-heat the wrapped edges to lock the adhesive’s memory and activate the self-healing properties.
Last comes the audit. We go over every inch under high-intensity inspection lighting, checking seams, corners, and edges. If we spot it, we fix it before you ever do.
Common Pitfalls of DIY PPF vs. Professional Shop Installation
Tempted by a weekend project? Here’s where home garage installs usually go wrong:
• Dust nibs trapped under the film
• Silvering lines from poor squeegee technique
• Edge lifting from weak prep or bad heat work
• Alignment errors that show up as crooked seams
Fixing a botched install often means peeling off the film and starting over. Doing it right the first time costs less, and your paint stays safe in the meantime.
Discover what areas of your car need 3M Paint Protection Film most.
Protect the Paint You Paid For
A professional install turns raw film into this kinda invisible layer. This works every single day from salted February commutes to gravel-spitting summer highway runs. And then when resale time comes along, the clean, chip-free paint speaks loudly to buyers. That’s the long-term value of 3M Paint Protection Film in a city that throws grit and road salt at your car for months on end.
Ready to armor up? Book your 3M PPF consultation with Calgary Car Detailing today, and let’s get your paint covered before the next gravel truck rolls by.